How to make a guild badge in RAN Online....
I keep getting asked how to make guild badges in RAN Online, so I decided to just make a post to so I don't have to keep repeating myself over and over again.
First of all what's a guild badge anyway? What's it for? A guild badge is just a small icon displayed over your character's name which identifies which guild that character belongs to. To the right of the guild badge is your guild nickname.
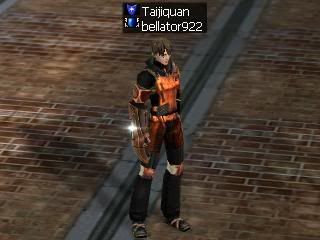
In reality, that icon is nothing more than an ordinary bitmap (BMP) file 16 pixels wide by 11 pixels high (16x11).
So how do you go about making your own badge? The simplest way is to open Microsoft Paint (in Windows XP, simply click the Start button, then scroll over to Accessories, then Paint), then click on Image on the Paint toolbar, slide the cursor to Attributes (you can also press Ctrl-E instead), select pixels as your unit, enter 16 in the Width box and 11 in the Height box, then click OK. You'll get a 16x11 drawing area. Of course, the drawing area is a bit small, so press Ctrl-Pg Dn to zoom in on your blank bitmap.
At this point, all you have to do is let your creative juices flowing, and draw whatever badge design you have in mind. Of course, this method assumes that you have at least some drawing ability. When you're done with your masterpiece, press Ctrl-Pg Up to bring the bitmap to normal size so you can see if your design scales well to 16x11. Oftentimes it doesn't, so you may have to go through some trial and error before you end up with a badge that you're satisfied with. Once you're done, just click File on the toolbar and save the image as a bitmap.
It goes without saying that you're not limited to using Microsoft Paint. You can use any drawing/paint program you're comfortable with, as long as the end product is a 16x11 bitmap. Don't save your badge using JPG or GIF formats. They won't work.
If you have little or no drawing skills like me, there is another method for making badges, though it requires you to use some math and/or guesswork. This method involves searching for an appropriate picture to transform into a guild badge, then scaling it down to 16x11 pixels.
For example, if you want, say, a badge with a sword on it, first look for a picture of a sword on the internet. The easiest way is to log on Google, click Images on the top row, enter "sword" in the search box and click Search. Find a picture you like (it can be in any format, like JPG or GIF), and download it to your PC.
Take note that not all pictures scale well. A 16x11 pixel format does not offer a whole lot of resolution, so you'll definitely lose most, if not all of the detail in the original picture. In order to ensure the best results, try to choose a picture with little detail to begin with. Not having much detail will mean that the picture won't lose much when shrunk to 16x11 pixels. You should also use a picture that is in landscape orientation (as opposed to portrait), as close as possible to a 16:11 ratio between width and height. It doesn't have to be exact, but the closer the better.
If you already have your picture, start Microsoft Paint and open your picture with it. This is where the math and guesswork part comes in, since you have to scale it down to 16x11. Click Image on the Paint toolbar, and scroll down to Stretch/Skew (alternatively you can press Ctrl-W). Under Stretch, enter a percentage figure into the Horizontal and Vertical boxes. You're scaling down, so you're looking at a figure below 100%. If you want to reduce a picture to half of its original size, put 50% in both boxes, if you want to shrink the original picture to a third of its original size, put 33% in both boxes, if you want to shrink the picture to quarter size, put 25% in both boxes, and so on and so forth. This involves some trial and error, so don't be afraid to experiment with different percentages. If you make a mistake, simple press Ctrl-Z to undo your last change.
The trick is scaling it down to being exactly 16x11 pixels. There are probably going to be some variances, so feel free to add or remove an extra row or column so that the result is 16x11. This is done in Paint by simply clicking on the corner of your picture and dragging it.
You may not get it right on the first try using this method, or even get a useable badge in your first attempt, so be patient. When you finally end up with a badge you like, as with the previous method, save it as a bitmap.
Copy the bitmap to your My Documents folder. Remember that it has to be in your My Documents folder, otherwise the game program won't be able to find it.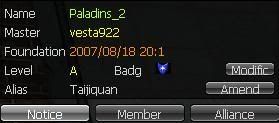 Fire up RAN Online, press G to access the guild window, click on Modific button (which presumably stands for modification), and enter the filename of your saved badge (just the filename, e.g. badge.bmp, don't put in drive letters or subdirectories) and press Enter. Remember that in order for you to be able to change guild badges, you have to be either a guild leader or someone authorized by the guild leader. If you're not either, the Modific button does not appear.
The badge should show up over you character immediately.
To recap, all you need to make a badge is a graphics program which can handle bitmaps. You can use any graphics program you like, though the directions above assume you're using Microsoft Paint, which is standard on all Windows operating systems. The bitmap should be 16 pixels wide by 11 pixels high, and it should be placed in your My Documents folder.
I hope this post answers your questions on how to make guild badges.


Comments